
Common Mistakes People Make When Building Mechanical Metal Puzzle Models
It’s usually a stripped screw that stops you cold. About 40 minutes in. Your hands freeze. You flip the instructions, searching for a trick you missed. That moment of quiet panic is the start of real learning.
Mechanical metal puzzle kits look clean and logical on the box. The build process is where reality lives. Small mistakes stack up fast, and fixing them is never as clean as getting them right from the start.
This guide walks through the most common errors builders make. It’s not about theory. These are the hard lessons, learned one stubborn gear at a time.
But over-tightening is a silent killer. It warps thin plates. It binds delicate joints. It freezes parts meant to glide.
The Danger of Rushing the Start
The first steps feel too easy. The parts are big. The movements seem simple. That’s the trap.
Cutting corners early almost always shows up later. You get misaligned frames. Gear teeth that grind instead of mesh. A twist you didn’t notice in step three that locks the entire mechanism by step thirty.
These models are systems, not decorations. Early misalignments echo.
The practical fix: Go slower than you think you need to at the beginning. Dry-fit parts before you commit. If something feels the slightest bit off, it is.
Reading Instructions Like a Novel
Instruction booklets for these kits aren’t stories. They’re technical diagrams in disguise.
People get tripped up by:
• Skipping the tiny symbols and callouts.
• Missing the subtle orientation arrows.
• Assuming mirrored parts are identical.
It’s often the confident builders who trust their gut over the page. That confidence is the problem.
What the pros do: They read three steps ahead. Every single time. They don’t just see where a part goes now; they understand where it needs to be later.
The False Security of a Tight Screw
Metal feels strong. So, tightening a screw until it won’t budge feels safe. It feels final.
But over-tightening is a silent killer. It warps thin plates. It binds delicate joints. It freezes parts meant to glide.
These puzzles rely on calculated friction. Crush it with force, and the mechanics die.
The golden rule: Tighten until it’s secure, then stop. If it’s supposed to move, test that movement before you move on.

The Chaos of an Unorganized Table
Parts spread across the desk seem fine. It looks creative. Until you accidentally swap two nearly identical brackets.
That mistake often doesn’t surface until much later, when taking things apart feels impossible.
In build forums, most do-overs trace back to mixed-up parts, not broken ones.
The simple habit that saves you: Sort parts by step. Use a muffin tin, small bowls, or labeled baggies. Keep the screws you’ve already removed separate from the ones waiting to be used. Tidiness feels tedious. A full rebuild feels terrible.
Forcing It When It Fights Back
Metal doesn’t yield gracefully. If a piece resists, pushing harder usually ends in bent tabs, tiny fractures, or a permanent misalignment.
We often mistake resistance for a test of strength. It’s almost always a sign of misalignment.
Shift your mindset: Resistance is a question, not a challenge. Stop. Re-examine the orientation. Check for left-hand vs. right-hand symmetry. Look again.
The Marathon You Planned as a Sprint
These kits reward patience. Too many builders block off a Saturday afternoon, expecting to be done by dinner. The model has other plans.
Rushing leads to foggy thinking, skipped details, and sloppy work. Studies on precision tasks show our error rate skyrockets after about 90 minutes of straight focus.
The better way: Plan for short, focused sessions. Set clear stopping points. Walking away before frustration wins is a strategy, not a surrender.
Skipping the Final Tune-Up
Clicking in the last piece isn’t the end. That’s just assembly. What comes next is calibration.
Common oversights include:
• Not testing the full range of motion.
• Ignoring the adjustment screws.
• Dismissing a faint grinding sound as “it’ll wear in.”
Stiffness rarely works itself out. It usually gets worse.
Your final checklist: Slowly rotate every moving part. Look at the model from all angles for symmetry. Listen closely. Make the small adjustments now. This step is what turns a static sculpture into a satisfying machine.
Chasing a Flawless First Build
Everyone makes mistakes. Even the experts. These puzzles teach through friction.
The emotional errors hurt the most: tearing the whole thing apart to restart, disassembling more than needed, or losing heart halfway through.
Most mistakes are local, not global. You can usually fix one step without starting over.
The hard truth: Progress beats perfection. Learning how the machine works is more valuable than a spotless first attempt.
Why These Mistakes Are So Common
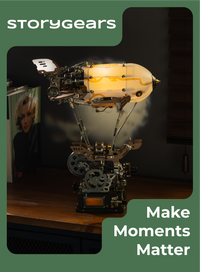
This is the core of it: mechanical metal puzzles live where art meets engineering. They look like decorative sculptures. They behave like precise machines.
That gap between expectation and reality is where most errors are born. We approach them like puzzles to be solved, when we should approach them like engines to be understood.
Where Every Step is a Lesson Earned
These models reward a specific kind of attention. They ask for patience, respect for the process, and a willingness to listen to the metal. The mistakes listed here don’t discriminate; they trip up beginners and seasoned builders alike.
Avoiding them isn’t about genius; it’s about discipline. That discipline is what transforms frustration into focus, and a box of parts into something that feels alive in your hands.
It’s this exact mindset where every step is earned that brands like Mecrob build for. The finished model doesn’t just sit on your shelf. It tells the story of how it got there.


