
How to Turn Your Mood Bot into a Love Confession Robot
How to Turn Your Mood Bot into a Love Confession Robot
Follow this detailed guide to transform your Mood Bot into the ultimate love confession machine, perfect for expressing your feelings!
Step 1: Download and Install Arduino IDE
- Go to the Arduino IDE Official Download Page.
- Download the version that matches your operating system (Windows is recommended for better compatibility).
- Follow the on-screen instructions to complete the installation.
Step 2: Install the Required Libraries
- Open Arduino IDE.
- Navigate to Tools > Manage Libraries.
- Search for and install the following library:
- U8g2: This library is used to control the OLED display.
- Once installed, close the library manager.
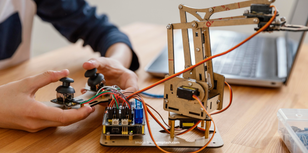
Step 3: Set Up Your Hardware
- Use a data cable to connect the Mood Bot display to your computer.
- Ensure the Mood Bot is powered on and the connection is stable.
Step 4: Upload the Code
-
Download the Code:
- Join the Mecrob Discord community and navigate to the Mood Bot Emoticon File channel to download the love confession robot code.
-
Open the Code:
- Copy and paste the downloaded code into the Arduino IDE editor.
-
Configure the Board and Port:
- Go to File > Preferences.
- In the Additional Boards Manager URLs field, enter the following URL and save:
http://arduino.esp8266.com/stable/package_esp8266com_index.json
- Wait for the board data to load, then navigate to Tools > Board > Board Manager.
- Search for and select LOLIN (WEMOS) D1 R2 & mini.
- You’ll see the following message:
Click Yes and wait for the
The "esp8266" core has to be installed for the currently selected "LOLIN(WEMOS) D1 R2 & mini" board. Do you want to install it now?esp8266package to download and install.
-
Compile and Upload the Code:
- Click the Verify button (checkmark icon) to compile the code and ensure there are no errors.
- Once compiled, click the Upload button (arrow icon) to write the code to your Mood Bot.
Step 5: View the Display
- After successfully uploading the code, the OLED screen on your Mood Bot will initialize automatically.
- The screen will display dynamic expressions, cycling every 1.5 seconds.
- If you’ve uploaded the confession code, the screen will show hearts, love messages, or personalized expressions to make your confession extra special.
Tips for Customization
- If you want to create your own expressions or messages, use the online tool Image2cpp to convert images into code and replace the existing expressions in the code.
- For a dramatic effect, place your Mood Bot in a gift box and let the surprise unfold!
Troubleshooting
-
The screen doesn’t display anything:
- Check the I2C address of the OLED display, which should default to
0x3C. You can use an I2C scanner code to confirm. - Ensure all cables are connected correctly.
- Check the I2C address of the OLED display, which should default to
-
Code upload fails:
- Make sure the esp8266 package is installed and the correct board and port are selected.
-
Want more expression options:
- Modify the Arduino IDE code to add new expression patterns or use drawing tools to generate unique ones.
Turn your Mood Bot into the perfect confession companion, ensuring your heartfelt emotions are delivered in style! ❤️